


Try it at the link below
Demo username and password
Username: saketverma831@gmail.com
Password: 1234567890
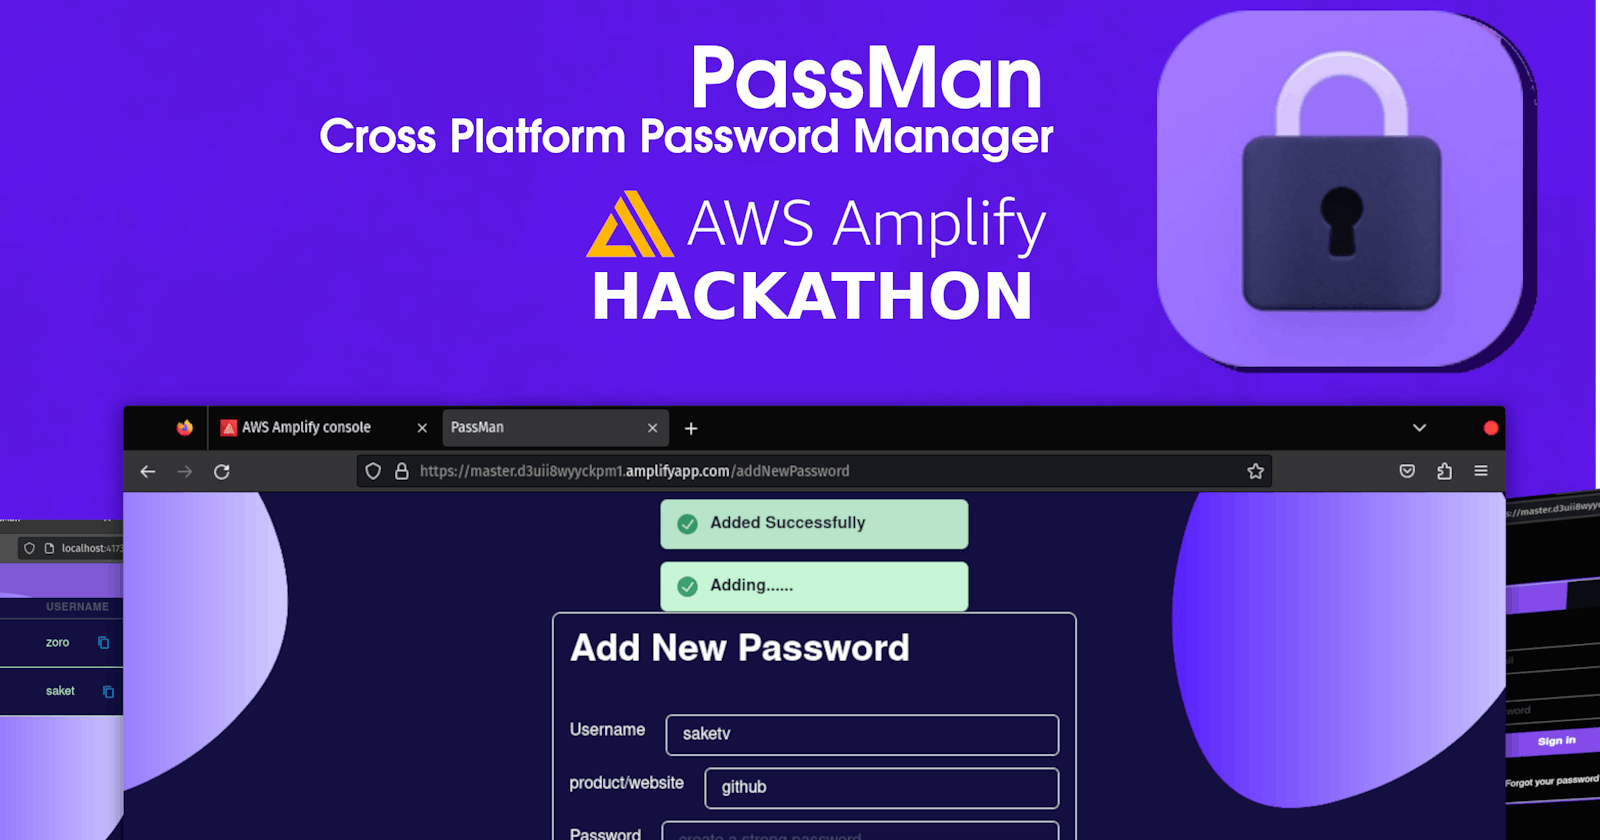
Introduction 🙋🏻
PassMan is a cross-platform (PWA) that helps users to create and manage their Passwords and Credentials for multiple Websites, And to access them from any device be it IOS, Android, Mac, Windows or Linux in a secure way.

The Problem 🕵️♂️
Many Databreach By huge Companies Have been reported in the last 2 years which got me thinking it would be nice if we can just take care of our security.
The Solution and Motivation 💡
Create a self-hostable cross-platform password manager.
This AWSAplifyHackathon looked like a nice chance to make a self-containerized cross-platform app for this purpose. also, the hackathon was a plus point 😋.

Technology
Backend As a service
AWS Cognito
AWS AppSync
AWS DynamoDB
AWS Lambda
Fronted Library
Reactjs
Amplify UI React
Code
Setting Up Project
Install react using
npx create-react-app passmanInstall aws-amplify
 yarn add aws-amplify
 # or
 npm install aws-amplify
Add Amplify's react ui to the project
yarn add aws-amplify @aws-amplify/ui-react
Configuring Backend
After installing all the necessary libraries first thing we need to do is to set up amplify CLI which will help connect your project to AWS amplify and you can make changes using CLI or Studio
run amplify configure and it will walk you through the process
It will prompt you to log in to your account on the webpage do that and there you go you are connected to your backend.
now that is out of the way let's get started with your Fronted
Creating a Login/Signup page using Cognito
Setup Backend Project in Amplify studio
- navigate to AWS amplify
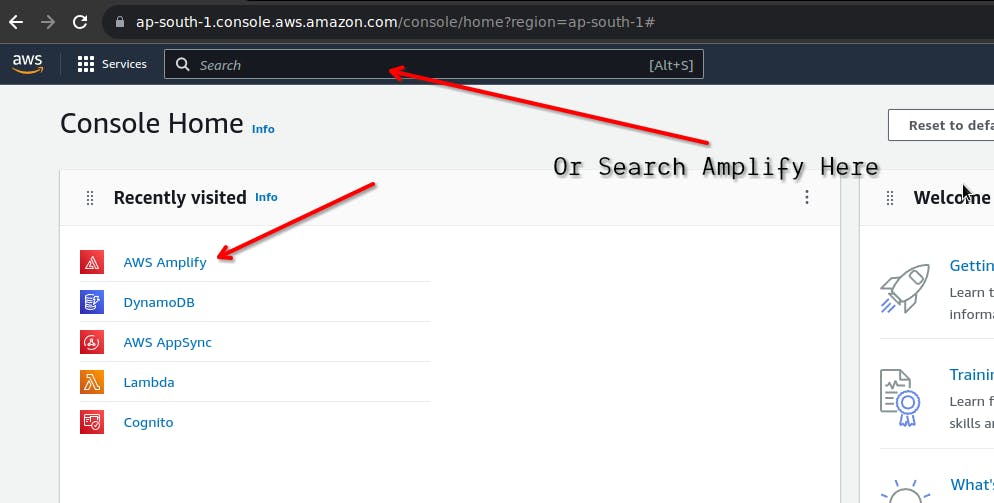
Buil a new project and walk through the process that should land you to a new project
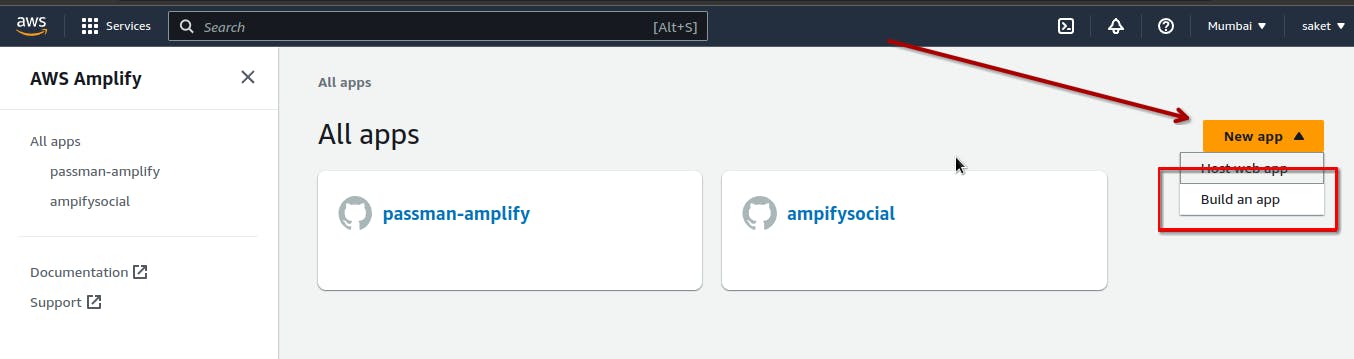
Now your project should be displayed in All Apps section navigate to it and open the studio for that app.
In Studio go to this authentication in the left navigation menu, configure it with email authentication and click on deploy to deploy.
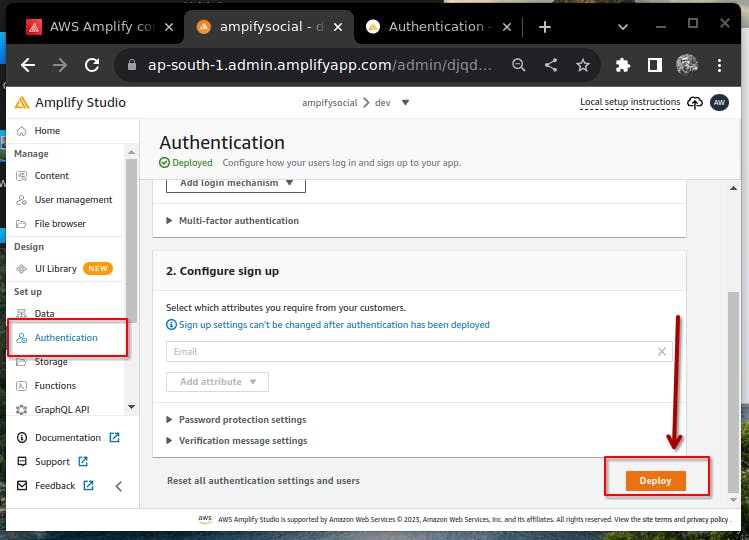
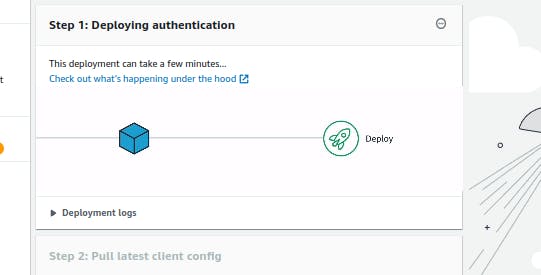
It might take a few minutes to deploy the cognito user pool so,take a back and come back when it's done
Looks like its already done
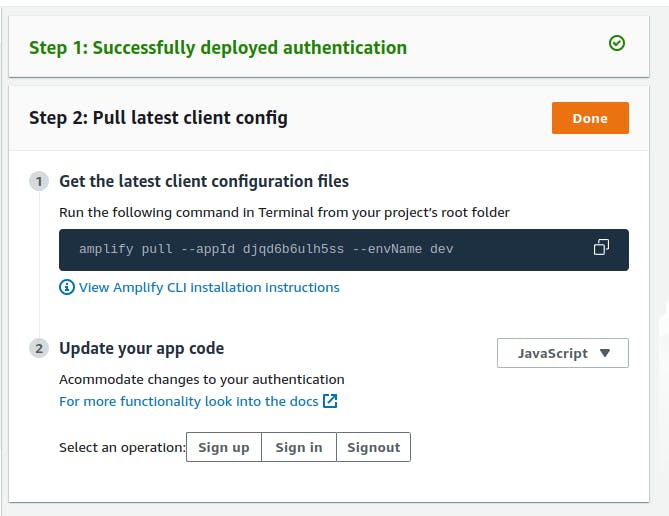
Copy the command and paste it into your project terminal on your
machine. It will update your machine with the latest configurations.
Creating a login Page With react ui components provided by Amplify
At the entry point (mostly Ap.jsx) do this
// import ui components
import { Authenticator } from "@aws-amplify/ui-react";
import '@aws-amplify/ui-react/styles.css';

// configuring AWS
import awsExports from './aws-exports';
Amplify.configure(awsExports);
...
Next, Wrap your Main home page component around <Authenticator></Authenticator>
<Authenticator>
 <App />
</Authenticator>,
In our case, we will be using react-router-dom for routing, so it should look something like this.
export const router = createBrowserRouter(
[  {
    path: '/',
    element: <Authenticator>
      <Outlet />
    </Authenticator>,
    children: [
      {
        path: "",
        element: <MainBody />
      },
      {
        path:"addNewPassword",
        element:<AddNewPassword />
      },{
        path: "updatePassword",
        element: <UpdatePassword />
      }
    ]
  }
]
)
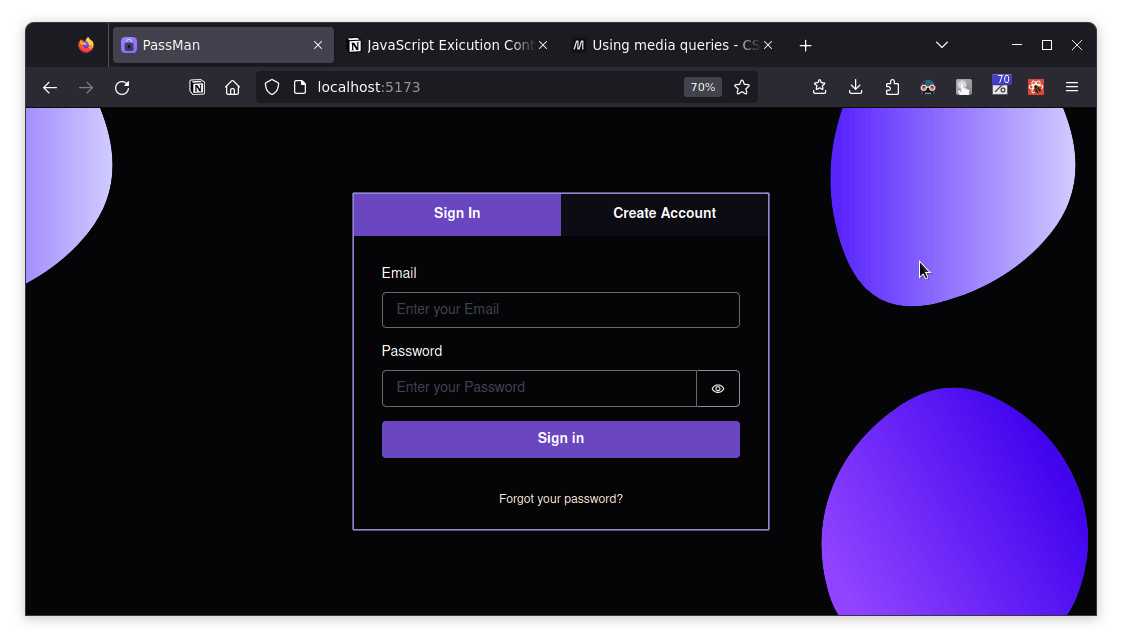
now run the app in localhost and you will find the login page written there.we can override the default CSS with our custom
/* Amplify Theme Overiding */
.amplify-button[data-variation='primary'] {
  background: #6B46C1
}

.amplify-tabs-item[data-state='active'] {
  background: #6B46C1;
  color: white;
  border: none;
}
.amplify-tabs-item[data-state='inactive'] {
  background: #0d0b13;
  color: white;
  border: none;
}
div[data-variation="default"]{
  height: 100vh;
  width: 100vw;
  background-color:#050507
}
div[data-amplify-container]{
  border: solid #6B46C1 2px;
  border-radius: 5px;
  background-color: aqua;
}
div[data-amplify-router-content] > div {
  background-color: #050507

}
.amplify-input.amplify-field-group__control {
  color: aliceblue;
  border-color: #6a6a6a;
}
.amplify-input.amplify-field-group__control:focus {
  color: aliceblue;
  border-color: #6B46C1;
}

.amplify-label {
  color: white;
}
.amplify-field__show-password {
  color: beige;
}
.amplify-field__show-password:hover {
  color: beige;
   background:#6B46C1 ;
}
.amplify-button--link.amplify-button--small{
  color: antiquewhite;
}
.amplify-button--link.amplify-button--small:hover{
  color: antiquewhite;
  background-color: hsla(258, 50%, 52%, 0.214);
}
[data-amplify-authenticator-resetpassword] {
  background-color: black;
}
[data-amplify-authenticator-resetpassword]  h3 {
  color: white;
}
That's all for authentication, Know let's see how can we do API requests to appsync.
open the console and navigate to the Data tab, here we will need to Create a single table name 'Passwords' which we will use to save our users data using userId as a relational key
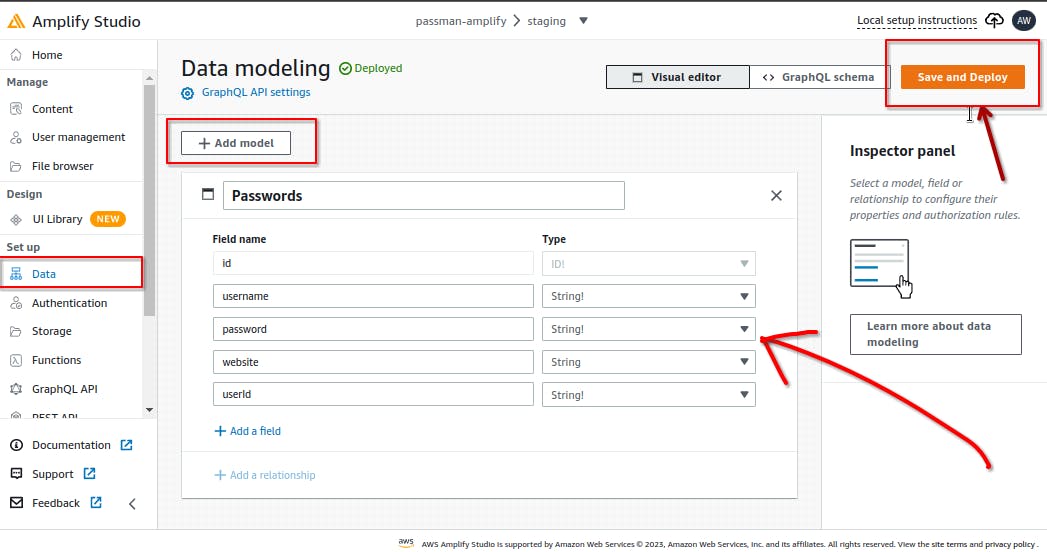
click deploy and then do amplify pull to add the database configurations to your front end.
further we can use this amazing tool in our amplify console to test our graphic APIs, the API will later use in our frontend
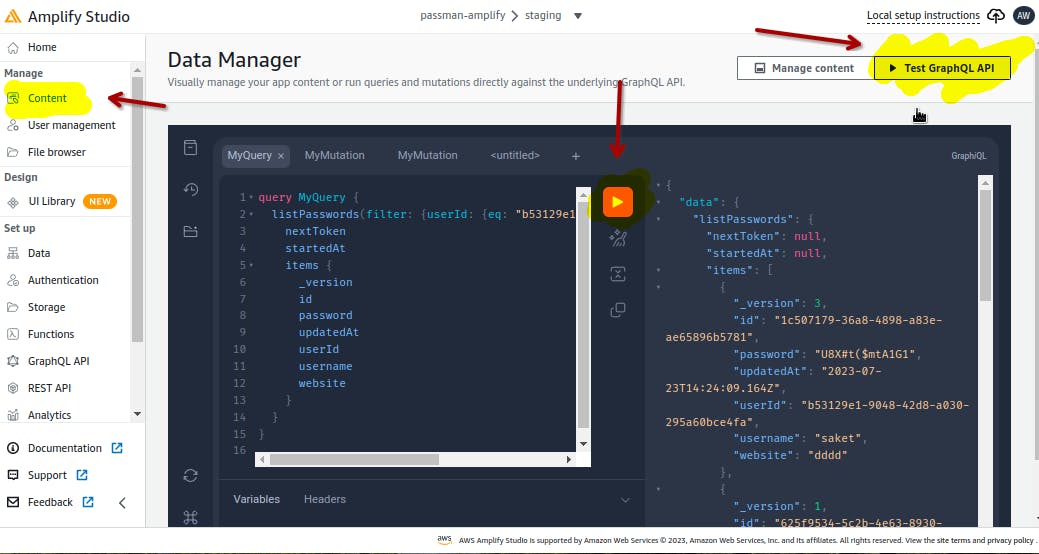
Let's use this API in our frontend
we will use API method provided by aws-amplify library to make requests.
NOTE: in amplify studio in the database you must enable cognito userpoll access to the database
import { API } from "aws-amplify";

/* List */
export async function getAllPasswords(userId) {
  const listAllPasswordForuser = (userId) => `query MyQuery {
    listPasswords(filter: {userId: {eq: "${userId}"},_deleted: {ne: true}}) {
      items {
        userId
        id
        website
        password
        _version
        username
      }
    }
  }
  `;
  const list = await API.graphql({
    query: listAllPasswordForuser(userId),
  });
  return list;
}

/* Create */
export async function createServiceCredentials(newCredentials) {
  const { product, userId, password, username } = newCredentials;
  const res = await API.graphql({
    query: `mutation MyMutation {
    createPasswords(
      input: {username: "${username}", password: "${password}", userId: "${userId}", website: "${product}"}
    ) {
      id
    }
  }
  `,
  });
  return res;
}

/* Update */
export async function updateCredentials(values) {
  const { id, username, userId, password, _version, website } = values;
  const mutationUpdateCredentials = `mutation MyMutation {
  updatePasswords(
    input: {id: "${id}", password: "${password}", username: "${username}", website: "${website}", _version: ${_version}}
  ) {
    id
  }
}`;
  return await API.graphql({ query: mutationUpdateCredentials });
}

/* Delete */
export async function mutationDeleteCredential(id, _version) {
  const query = `mutation MyMutation {
      deletePasswords(
        input: {id: "${id}", _version: ${_version} }
      ) {
        _deleted
      }
    }`;
  return await API.graphql({ query: query });
}
Now you can use these functions to talk to our backend.
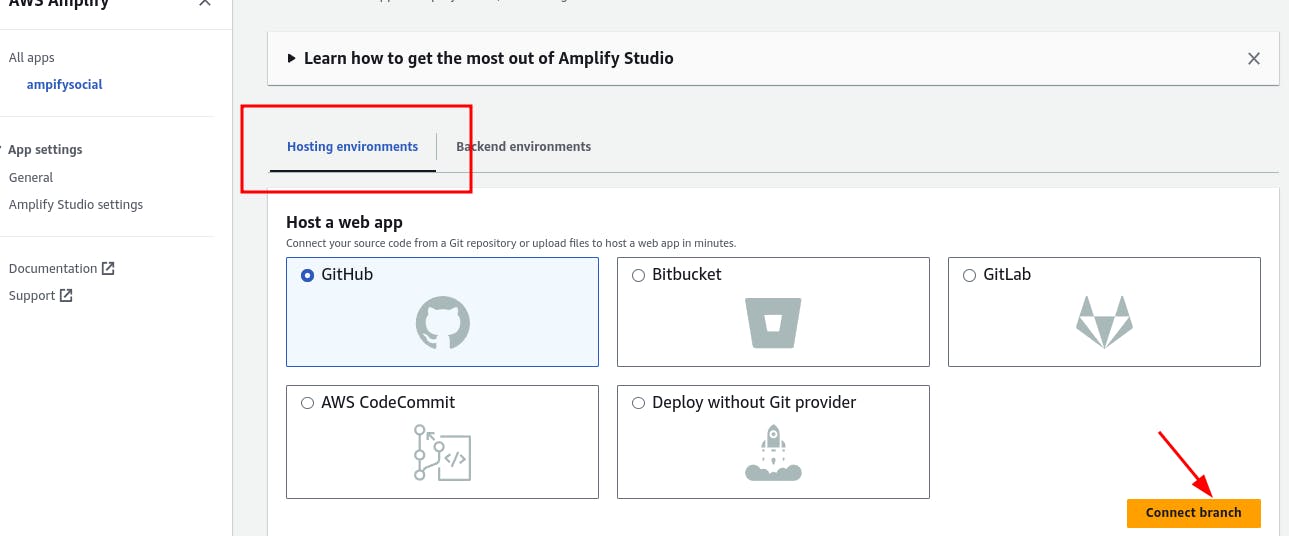
Hosting The Frontend
Prerequisite: app must be in a git or other similar repository supported by aws-amplify as this repository will be used to set up CI/CD by AWS.
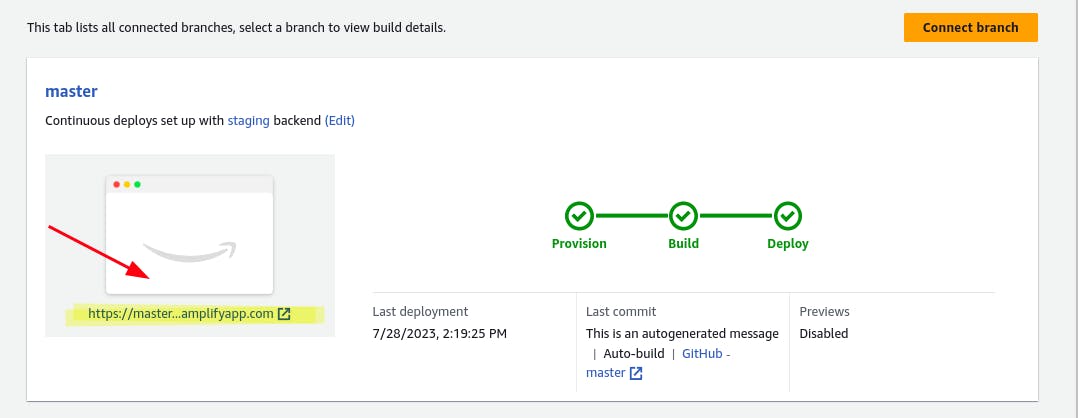
now navigate to your amplify project and click on the hosting environment.
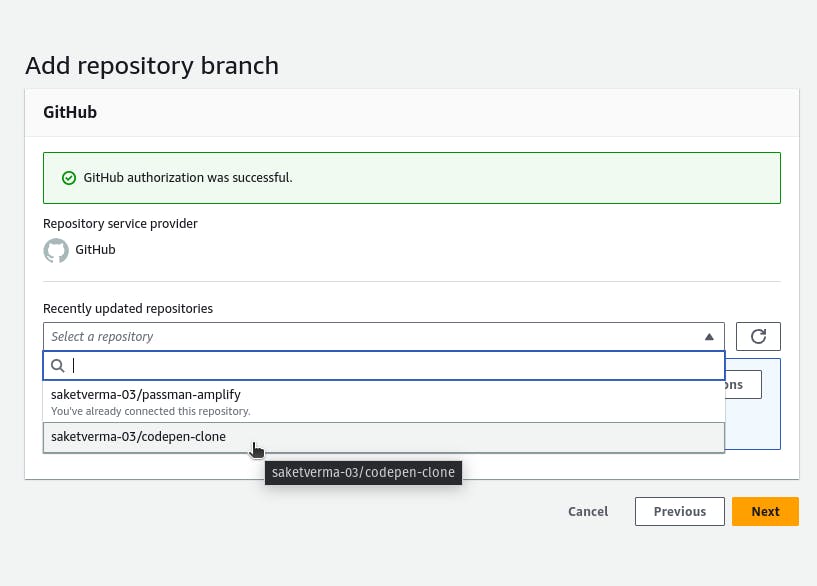
from there select GitHub then click on connect branch , and follow the prompts to connect to your git repository
select repo
IMPORTANT: edit the baseDirectory to point to your build folder, in case you used vite , build folder is dist
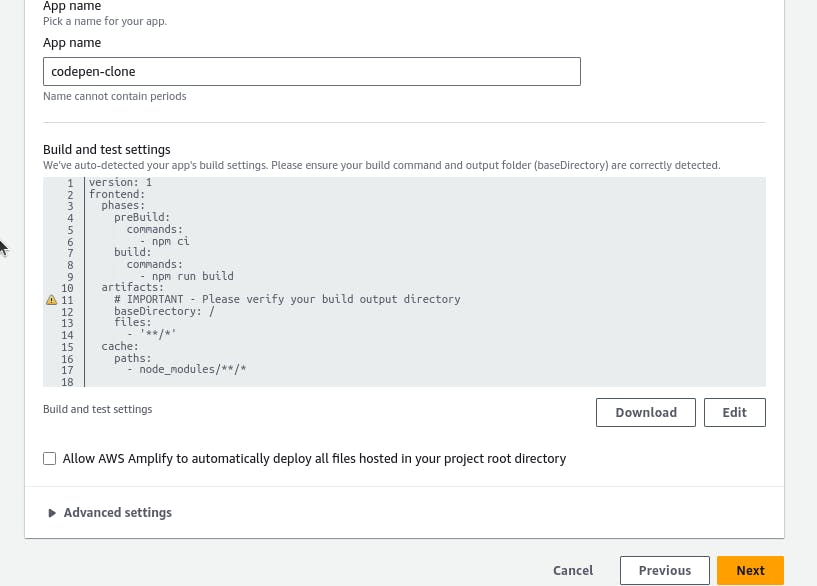
That's all now click next > next and amplify will take care of the process
after all the process is done you will see your this page with a link to our hosted app
Now let's see what PassMan can do
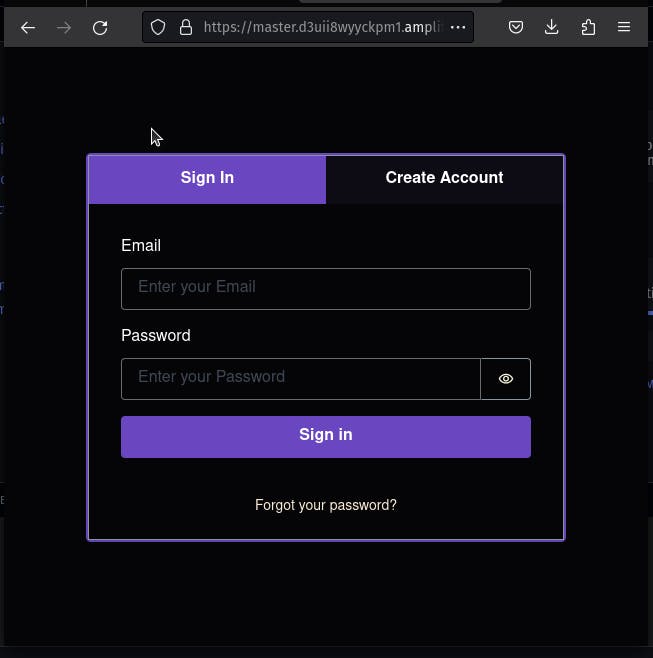
Login/Signup Functionality
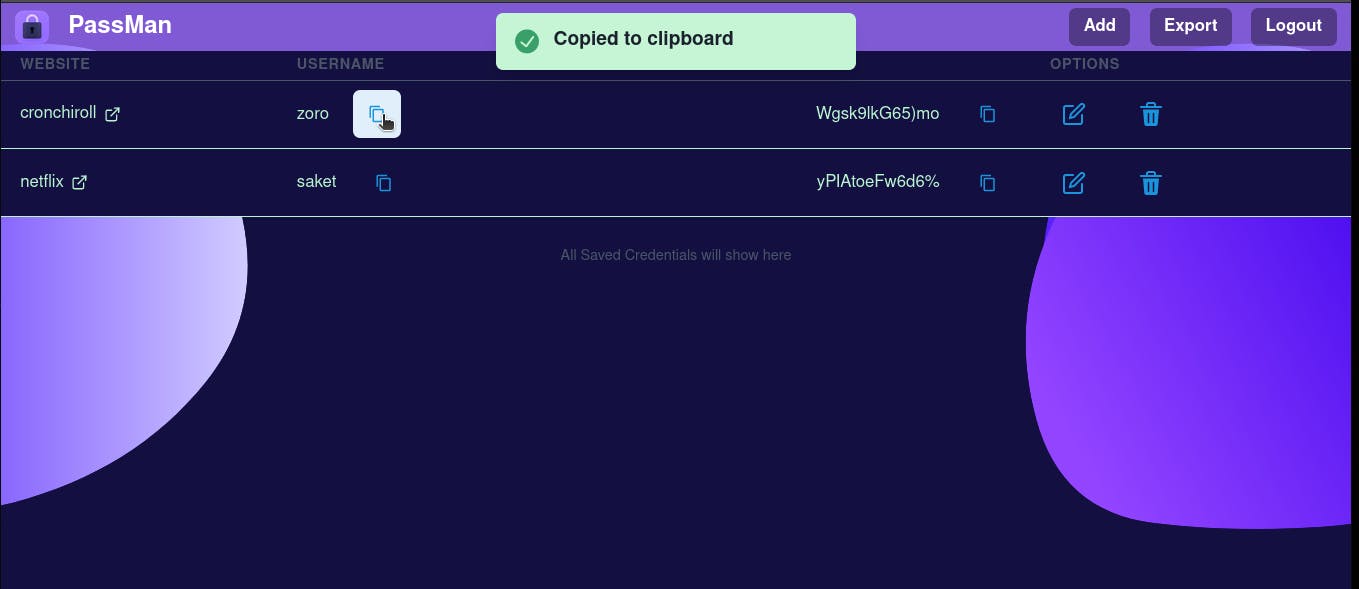
Manage and Copy Credentials
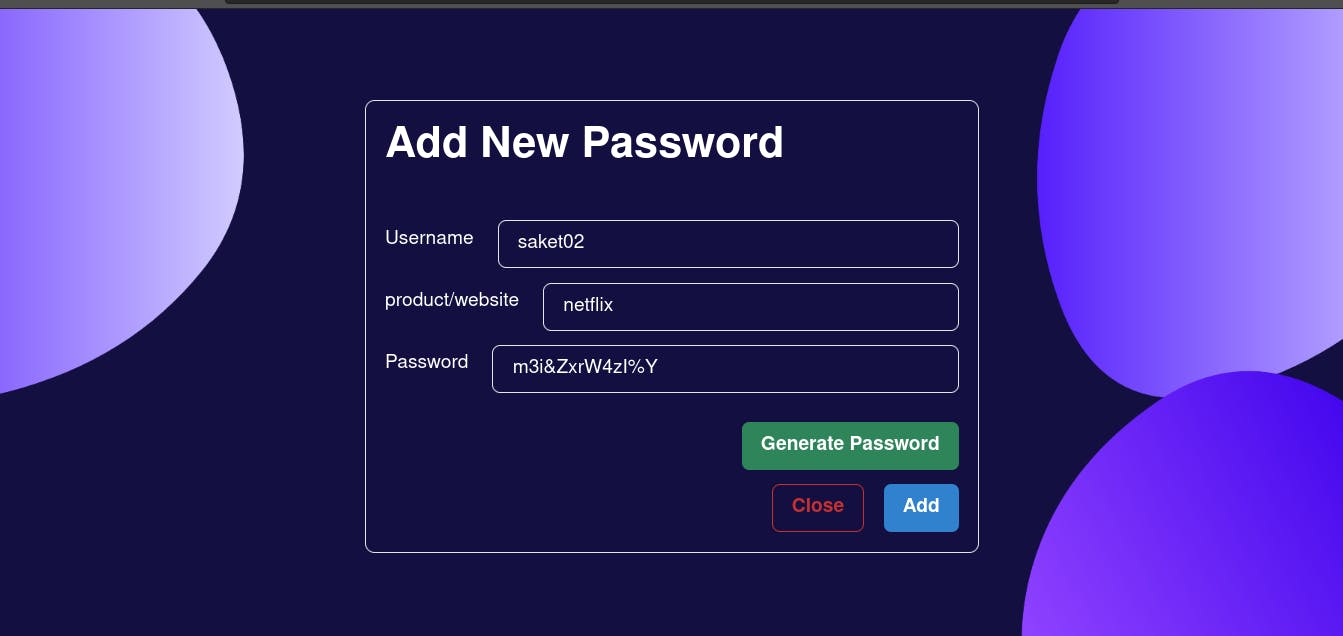
Add and Update Credentials
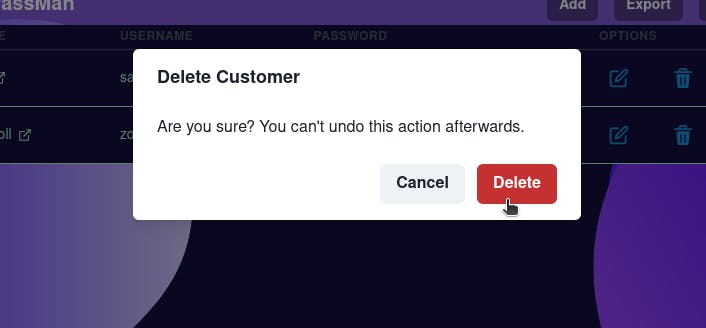
Delete Credentials
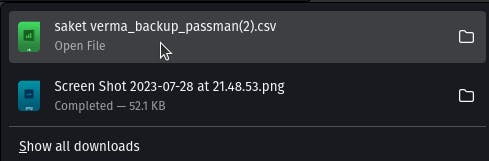
Export to CSV
Demo video and Repository
Demo username and password
Username: saketverma831@gmail.com
Password: 1234567890
The Features Of PassMan
Cross-platform i.e you can install it on any device
builtin Strong Password Generator
CSV export option
well that was long. Thanks for reading it till the end